Showing posts with label concoctions. Show all posts

Friday, August 23, 2013

Update: Homemade Body Wash

Since my post about Homemade Body Wash in February, I've continued to make and use it. I've developed some tips and tricks after making it a few more times that I thought I'd share with you. Heaven knows the first time I made it turned out to be kind of a disaster so hopefully some of these tips might answer some questions you might have or make the process a little easier.


1. Grate the soap using a food processor
Put the round multi-blade attachment so the smallest holes are facing up and push the soap down into it. Grating the soap as fine as you can makes the melting process much faster. Trying to break it up in the food processor with the normal blades around the bottom of the container doesn't work. The soap will just get stuck to the blades and won't break up. Trust me. Using the food processor dirties a few more dishes, but it's so much faster and it won't give your hand a cramp.

2. Use 3 cups of water per bar of soap
The original recipe I followed called for 2 and I accidentally added 3 the first time I made it which worked out great. I thought I'd give 2 cups a try this time to see how it turned out. Once it cooled, it was too solid. I could have poured it into molds while it was still hot and would have ended up back with bar soap again! It's supposed to thicken up. Really, it is. But there was no way that would break up in my blender (see #5). Maybe it's the type of soap I'm using. (My wonderful mommy bought me Caswell Massey Almond Cold Cream Bath Soaps. Yuuuummy!! I'm super spoiled.) If you're unsure of how much water to add, try making it with 2 cups and see how it turns out. If it's too thick once it cools, simply add another cup of water and put it back on the heat. It will melt in a matter of minutes at this point because it's already watered down.

3. Stir as you're waiting for the soap to melt in the water
In the past, I've always tossed in the grated soap and walked away. I'd come back every few minutes and very little progress would be made as far as melting is concerned. I'd stir it and walk away again. I'd do this for upwards of an hour and a half! Ain't nobody got time for that!! I tried stirring it today and, what do you know, it went so much faster. A matter of 15-20 minutes or so!

**Remember- 
Bring the water to boil and then turn down the heat so no bubbles are surfacing
 before you put in the soap. The soap will burn to the bottom of the pan if you melt it at 
too hot a temperature. 

4. Wait for the soap to cool completely before putting it into your container
The soap will solidify a lot which leads me to my next tip...

5. Blend it
In a blender. Or if you happen to be one of the lucky ones, use your immersion blender. The blender will break it up so it's no longer solid and make it so nice and creamy and rich. And it will stay that way when you put it in your body wash container.


I hope this helps. Making body wash used to be stressful for me because I never knew how it was going to turn out. But now I know that by using these tricks, the process will be easier, faster and the end result will be so worth it.

Thursday, August 8, 2013

Homemade Garbage Disposal Refreshers


Homemade Garbage Disposal Refreshers
  • 3/4 cup baking soda
  • 1/2 cup salt
  • 1/2 teaspoon liquid dish soap
  • 1 lemon or 2 limes
The original recipe called for lemon, but my family has this obsession with limes. We have to buy the bulk bag from Costco. Maybe it's weird, but we put lime juice on just about everything these days. Our friends laugh because anytime they stop by for dinner, more often than not they'll hear me say, "try it with a little lime juice. It's really good!" I have limes ready and waiting on my kitchen table... in a crystal bowl. They're just so pretty!


Mix the salt and baking soda together making sure there are no lumps. Then add the liquid dish soap and zest the lime peels into the mixture. Add the juice from the lime. Start with one and add as needed so the consistency looks like course sand. Cover a cookie sheet with wax paper and, using a rounded teaspoon measuring spoon as a mold, pack the mixture tightly into the spoon and tap lightly on the pan to gently coax it out. Let them dry over night. Once they are dry, store them in a sealed container by your sink. Anytime your garbage disposal is smelling less than lovely, drop a few in and flip the switch. 


Honestly, I don't have much to say about these things. The idea is great, but I don't know that the effectiveness is worth the time and effort put into making them.  I haven't decided yet. I'll update you later on when I come to a solid conclusion.

Monday, July 22, 2013

All-natural bathtub cleaner

Alright, guys. Here it is. I found my new favorite way to clean my bathtub. You're going to read it and think I've lost my mind, but it's seriously awesome. It's so different that, dare I say it, it makes cleaning my tub fun! Well, for me at least. And it doesn't get more kid friendly than this. I would trust my 2 1/2 year old to use this! I found this recipe amidst many other green cleaning recipes here. I'm definitely going to try a few others, but I couldn't wait to share this with you guys. 


Tub Cleaner
1/2 grapefruit
1/4 cup kosher salt

Cover your grapefruit half with some of the salt and scrub your tub. I continually added more salt as I needed more scrubbing power.


My tub was REALLY bad so I had to use the whole grapefruit, but it worked so well and I'm sure on a tub that gets cleaned regularly, half a grapefruit would work just fine. Completely destroyed the water ring and hard water build-up! And does anyone else hate having to rub your hand along the sides of your dirty tub searching for any foreign texture just to make sure you got it all? This may sound gross, but I liked how it kind of tinted the dirty parts so I didn't miss anything and I didn't have to feel for anything grody. I think my favorite part was that it left my whole bathroom smelling so citrusy clean. 


So there you have it! An awesome, all-natural, super kid-friendly, green cleaning recipe for your tub. Try it out and let me know how it works for you. Or better yet, let your kids do it. :0)

Friday, June 14, 2013

DIY, reusable, knock-off Clorox Wipes


I'm in love! This might be one of my favorite homemade cleaning products I've made to date. Homemade knock-off Clorox wipes. It's honestly 100% better than the real deal. It's cheaper, eco-friendly, kid-friendly, and just plain more affective! I tried a different recipe first, but I didn't like the idea of using rubbing alcohol on all the things my kids are going to touch and/or put in their mouths, so I searched for other alternatives and I found this one


I started by cutting up about 3 old T shirts into Clorox wipe-size rectangles. I had an old baby wipe container laying around that was just perfect to keep these in. You can just toss them all in, but I'm the personality that needs to fold them up neatly so I did. Then I mixed together the recipe below.


I liked the idea of putting the recipe on the back of the container. Now I don't have to go scouring Pinterest to find the recipe each time I need it. I poured the mixture on top of the pile of rags and now I just shake it up a little each time I need one. And when I say "each time I need one", I mean about every hour. 


I have to try really hard to remember not to throw the wipes away after I use them and I toss them on the shelf over my washer and dryer. That way, I can dump them all int he washer at once and they go straight from the dryer back into their container. 

It's obvious that the cloth wipes will be more durable than the store-bought, disposable ones, but the texture of the material is also better for scrubbing. And one of these babies will last me WAY longer. I can wipe out both my bathroom sinks and my whole kitchen counter with only one wipe! It used to take me 3 Clorox wipes just to do my counter. Like I said before, this project is cheaper, eco-friendly, kid-friendly, and just plain more affective! 

Thursday, May 30, 2013

The "No-Poo" alternative to Shampoo. AMAZING!!!

So I've been experimenting with different techniques to try to maintain my bright red hair for longer. My first attempt was DIY Dry Shampoo, which has helped me go longer between washing my hair, but the sulfates in regular shampoo really do a number on my hair color, so I researched different recipes for DIY, sulfate-less shampoo and conditioner.  I found a lot of different ideas, but none intrigued me more than "No-poo."


I found the idea here. It's an extremely informative write-up about the subject, covering any question you might have. I highly recommend reading this if you're considering trying this method out. I didn't want to try to keep baking soda dry while using it in the shower so I used an old black pepper container; the kind that has 2 sides- one with the little holes and one with a wide opening. That way I can easily pour out what I need while the rest stays dry in a container that is not made out of cardboard.


No-Poo Shampoo:

1 cup water

1 tbsp baking soda

Conditioner:

1 cup water

1 tbsp apple cider vinegar
(you can use white distilled vinegar, too, but I use that ALL the time on other things and I had apple cider vinegar laying around just waiting so I went with that.)

I bought some ketchup and mustard squirters you can get at the dollar store in a pack of 2 and used those. The long, skinny opening at the top works really well for getting straight to your scalp.


Mix the baking soda and water in the squirter, shake it up so it's mixed together, and apply to your hair paying special attention to your roots. It should have a sort of slimy feel to it. If it doesn't, you might need more baking soda. I let it sit for about a minute or two and then rinse it out. Then, you mix the vinegar and water in the other squirter, shake it up so it's mixed together and apply to your hair paying special attention to your ends. The point of the vinegar is to neutralize the ph balance of your hair that the baking soda has thrown off. I let that sit for the rest of my shower and then rinse.


Seriously, this post answers any question you might have so I'm not going to waste time on fumbling out words when it's explained so perfectly elsewhere. I'm just going to share my experience and some tips I used to make the transition easier.

Let me start by telling what an amazing transformation my hair has had. I know this all sounds a little extreme, but I have had such luck with this method. I've used it almost exclusively for a couple months now and my hair feels absolutely amazing. There are so many pros to going this route that I've seen firsthand:

  • My hair holds style MUCH longer
  • Little to no product is needed to make my style hold
  • More natural volume
  • Less oily
  • No more frizz
  • More shine
  • Less hair loss
  • Hair color fades SO much slower
  • I wash my hair way less often
  • No chemicals
  • SO inexpensive
  • My hair is SO soft!
I got my hair cut and colored the other day so my amazing hair girl, Cassie, used regular shampoo and conditioner to wash the extra color out when it was done processing. I didn't realize what a huge difference the baking soda and vinegar made until I used the shampoo and conditioner again. We could feel the residue in my hair from the conditioner when we were done compared to when we first sat down! My hair looked and felt great, but after a couple hours, it was flat, oily and the style had totally fallen out. This just further proved to me how incredible this cheap and easy method is.

Now, there is an adjustment period that lasts about 6 weeks, and let me tell you, it doesn't start out pretty. Your hair has grown accustomed to being absolutely stripped by detergents and then having residue-leaving conditioner caked on in thick globs to make up for it. So when you eliminate that and introduce something a lot gentler, it takes some time to get used to it. My hair felt like straw. I could barely get a brush through the ends of it, but there were a couple things I did that made the transition a little easier. For starters, I didn't rinse the vinegar out for a couple weeks. My hair felt A LOT nicer. Yes, my hair smelled like vinegar while it was still wet but once it dried, it was left just smelling clean. Once I started rinsing out the vinegar again, it was fine. I also used a tiny, TINY bit of coconut oil on the ends which helped immensely.

I HIGHLY recommend trying this out. Give it 2 months and, if you still hate it, then go back to regular shampoo and conditioner. No harm done.


I really hope you check out the original post for more information if you're interested. I shared with you what I thought was relevant, but if you have any questions, please feel free to ask. And please share your experience with "No-poo" if you decide to try it out. I would love to hear how you felt about it.

Monday, May 20, 2013

Vitamin E Eye Cream


I'm not trying to brag or anything, but I really don't have any eye wrinkles yet. I definitely have some severe under eye circles and some serious bags, but not really any wrinkles. The only reason I'm telling you this is so you know that I can't tell you if this eye cream is effective in that sense. What I WILL tell you is that I love this eye cream anyway. It really improved the texture of the skin around my eyes which made makeup application a breeze. 

I got 12 of these little bitty containers at the dollar store. SUPER handy!

This recipe has only 2 ingredients and no specific measurements so it can't get more simple than that. 

Eye Cream

Coconut Oil

Vitamin-E (I used about 6 capsules for my container)


Fill your container almost all the way full with coconut oil and heat it up for about 30 seconds in the microwave, just until it's a consistency that will lend itself to mixing with another ingredient. Pierce the vitamin E capsules (I used an exacto knife), squeeze the contents into the coconut oil and mix together. Coconut oil solidifies under 76 degrees so it will harden back up as it cools. I told you- simple. The squeezing step is SUPER messy, though! Is there an easier way of going about this that I don't know about?


If you're interested in the health benefits of vitamin E and/or the original recipe, it can be found here. She covers a lot of pros to using vitamin E and it's definitely worth a read. 

Wednesday, May 8, 2013

DIY Scented Plug-Ins *FAILURE*


I was super excited about this project. With 2 boys in diapers, we need all the air freshening we can get. Needless to say, this was definitely a disappointment. I almost didn't share this experience with you guys, but I thought about it and decided that I would. We all have times when things don't go exactly according to plan and that is nothing to be embarrassed about. Who knows; maybe you have an answer to what I did wrong or why this didn't work out and I can fix my mistake in the future. 

I found this idea on Pinterest and it led me to this blog giving directions to re-use the plug-ins I had laying around my house. It also briefly covered the dangers of the ingredients in store-bought plug-in air fresheners (I had NO idea!). So I was all for giving it a go. You can find the directions I followed here

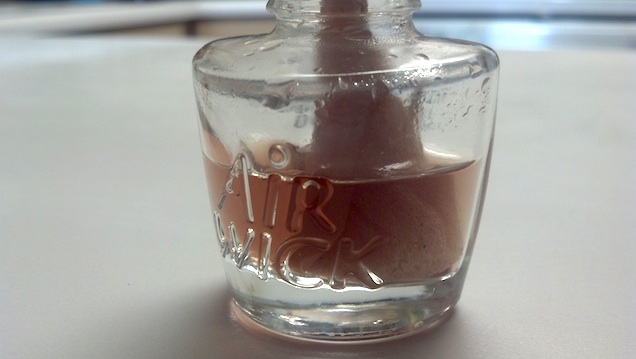
Theoretically, it's a great idea and they did spread their lovely scent around for a day or so, but then this happened:


Maybe it was the brand of plug-ins I used, I don't know, but after a couple of hours, the liquid inside the little glass bulb part started changing colors. Then the wick swelled up and took on this scary dark color. It made me really nervous and it didn't say anything about this happening in what I read so I unplugged them. They might be totally safe, I have no idea, but until I hear otherwise, these are staying away from my outlets. 


Have you had any DIY failures recently?

Wednesday, April 17, 2013

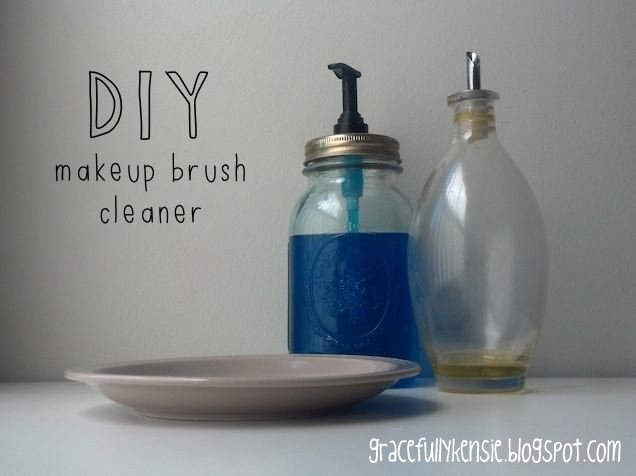
DIY Makeup Brush Cleaner

I've started to notice a trend in my life- the more boys I have and the longer I have them, the girlier I become. I think I'm just trying to balance out all of the insect flashcards and laughter when poop is mentioned. Anyway, with my ever increasing girly-ness comes more makeup. Okay, maybe not more makeup per se, but definitely makeup more often. I've also developed a good little army of makeup brushes that require some thorough cleaning with my increase in makeup application. I've tried a couple different recipes and I really liked this one. Anne-Marie posted this recipe over on The Beauty Book.


Makeup Brush Cleaner:

3 parts antibacterial soap (I just used the Dawn dish soap I had on hand)

1 part olive oil


I used the same technique she described in her post- get the brush wet, get some of the makeup brush cleaner on the brush and stroke back and forth on the palm of your hand. Do the same thing under running water to rinse it. 


Anne-Marie recommends wiping off the handles of your brushes as well. I used one of my new homemade, reusable, knock-off Clorox wipes (tutorial to come soon). You can see all the makeup that was just hanging out on my brush handles. 


I hung the bristles of my brushes over the edge of my desk so the water doesn't sit on the hairs and form mildew or eat away at the adhesive holding it all together. 


I really like this method. With this recipe, I KNOW that my brushes are getting squeaky clean and I'm eliminating any bacteria that might have started to lay down some roots.

What's your makeup brush cleaning method?


Friday, April 5, 2013

Homemade Deodorant

I have to apologize for arguably the longest hiatus ever. My family was in town last week and then I spent the better part of this week getting back in the swing of things, but now I'm back and ready to report on my latest homemade project.

I know- this may seem like I'm taking the homemade thing a little to the extreme, but when you see how simple it is to make, you just might reconsider.

I'll be the first to admit that I'm a One Good Thing by Jillee groupie, but she's got some great homemade products! I found this recipe on her blog (go figure) and she says that the reason we get underarm stains is because of the aluminum in regular deodorants. So this deodorant theoretically eliminates armpit stains! How great is that? So there would be absolutely no need for the underarm stain remover I wrote about a couple weeks ago. I haven't had a chance to test this on a new white shirt yet, but when I do, I'll update you on how it goes.

Homemade Deodorant

1/4 cup baking soda

1/4 cup corn starch

5 tbsp coconut oil

I mixed the baking soda and corn starch together and then heated up the coconut oil in the microwave for about 45 seconds. Once it melted, I added the coconut oil in a little at a time until I got a thick paste.


The consistency is a tiny bit gritty, like you would expect anything with baking soda in it to be, but it's really not bad at all. You apply it like you would lotion- but on your armpits. As a deodorant, I found it very effective (no BO for this gal), but I'm not crazy about rubbing it in with my hands. I think next time I'll try Jillee's other recipe for a solid deodorant. I promise to let you know how that goes when I do.

Friday, March 22, 2013

Pinterest Challenge #4: Homemade Makeup Remover

I am notorious for never taking my makeup off before bed. Sometimes, it goes so far as going days between washing my face. I know, I know, SO bad, but I've never claimed to have good skin or even good skin care habits so no judgment. I think my problem is the time. I always wait until I'm already exhausted and then the thought of trying to keep my hair out of my face and water dripping down my arms and blindly trying to find my towel just doesn't appeal to me. And any makeup remover I've used in the past has left my skin so oily that I had no choice but to wash it off immediately after anyway. So much trouble.


Anyway, I found this homemade makeup remover idea on Pinterest and I thought I'd give it a shot. I mean, what could it hurt? If I hate it, than I won't use it. Big deal. It sounded like the perfect solution to my lack of face washing at night- quick and efficient. And it has baby soap in it so I'm thinking using it is as good as washing my face, right? So here's the recipe I used to concoct my makeup remover:

1/2 cup water

3/4 tablespoon of no-tear baby soap

1 teaspoon coconut oil

4 drops lemon essential oil

I definitely improvised the recipe a little. Jillee always makes such big batches of things and I didn't want quite so much of certain ingredients in it. Also, I didn't make the reusable pads. I didn't have any flannel just lying around waiting to be used and I wasn't going to go out and buy some just for this project. Maybe I'll tackle that project another time, but for now, cotton balls work perfectly fine for me. 


My reaction to this project is very positive. I used to use baby wipes to try to get my eye makeup off, but I'd end up scrubbing quite a bit to get it off. With this, there was absolutely no scrubbing. A few swipes and all my mascara is on the cotton ball and off my eyelashes. Best part- absolutely not oily! This will make taking my makeup off before bed so much more worth the effort. 


A couple notes:

Jillee says to use any essential oil of your choice. Be SO careful when choosing your oil. Definitely DO NOT use peppermint. Your eyes will sting and burn for quite awhile. Even getting peppermint NEAR your eye can cause it to water and sting. I'm not sure about other oil options so do your research before making your selection. Btw, lemon doesn't burn.

Also, there was a comment about avoiding introducing bacteria on Jillee's post that I thought was worth sharing. It's by Catherine's Not Naturally Crafty. She says: 
'Now, under no circumstances should you pre-moisten the pads and let them sit OR should you keep that solution for more than a week or two. Also, do not dip a pad and re-dip a used or partially used pad. And make sure your hands, jar etc. are scrupulously clean before you mix up your cleaner and use clean hands before you apply. 'Cause otherwise that would be silly and you might introduce bad bugs into your solution. If you can tolerate tea tree oil a drop of that is a natural disinfectant and in small amounts has a nice "clean" smell.'

Thanks so much Jillee and Catherine!


Monday, February 25, 2013

Pinterest Challenge #1: DIY Dry Shampoo

For my first Pinterest Challenge project, I decided to give dry shampoo a try.  I had an experience a couple months ago that turned me off to store-bought dry shampoo.  I literally used it once and it was out.  I don't know what I could have possibly done wrong, but anything I did shouldn't have used it all up! What a waste of money!  So when I came across this DIY method on Pinterest, I was sold.  And the best part- its only two, cheap ingredients that I already have around my house.


DIY Dry Shampoo

1/4 cup corn starch

1/4 cup baking soda


Mix the ingredients together and put it in the container/dispenser of your choice. Thats it!  Super simple, right?

I used an old sugar shaker I had just laying around.  My method for applying it is a little different from the norm. The sugar shaker would dump out WAY too much to pour it right on my head, so I shake some out on a clean, flat surface (I usually use the back of my hand-held mirror) and I use a big powder brush to pat it onto my scalp. Different, I know, but it works for me!


Now I know what you're thinking- "Why the heck does her dry shampoo look red?" Well, I'll tell you. My only problem with the original recipe is that its white, which is fine, but it doesn't look great against my red hair, so I did my own little addition to the recipe to try to get it closer to my hair color. I had no idea what a process that was going to be.  I started with an old matte bronzer. REALLY orange and not a great look on my pale skin, so I broke it up with the back of a spoon and mixed it in.  This gave me a very light peachy shade. So then I tried a couple more things. I put a in a little cinnamon, but I didn't want my hair to reek of it, so I changed tactics.  I found some other old bronzer and that got it a little closer, but not enough. My last ditch effort was paprika. I was super nervous about this one but it really doesn't have too much of a smell and, after mixed in, the cinnamon covered up any hint of a smell that there might have been. So now I have a dry shampoo that is sort of a deep, dusty salmon color.  Hey, its not bright red, but its better than white. I'll take it.


After putting it to the test, I have to say I am happy with it.  I've been trying to wash my hair less often so it will be healthier and this little product makes it so easy to get through those more oily days. The baking soda and corn starch work together to soak up all of the extra oil and its a lot easier to mask that I've used it with the color.