Showing posts with label soap. Show all posts

Friday, August 23, 2013

Update: Homemade Body Wash

Since my post about Homemade Body Wash in February, I've continued to make and use it. I've developed some tips and tricks after making it a few more times that I thought I'd share with you. Heaven knows the first time I made it turned out to be kind of a disaster so hopefully some of these tips might answer some questions you might have or make the process a little easier.


1. Grate the soap using a food processor
Put the round multi-blade attachment so the smallest holes are facing up and push the soap down into it. Grating the soap as fine as you can makes the melting process much faster. Trying to break it up in the food processor with the normal blades around the bottom of the container doesn't work. The soap will just get stuck to the blades and won't break up. Trust me. Using the food processor dirties a few more dishes, but it's so much faster and it won't give your hand a cramp.

2. Use 3 cups of water per bar of soap
The original recipe I followed called for 2 and I accidentally added 3 the first time I made it which worked out great. I thought I'd give 2 cups a try this time to see how it turned out. Once it cooled, it was too solid. I could have poured it into molds while it was still hot and would have ended up back with bar soap again! It's supposed to thicken up. Really, it is. But there was no way that would break up in my blender (see #5). Maybe it's the type of soap I'm using. (My wonderful mommy bought me Caswell Massey Almond Cold Cream Bath Soaps. Yuuuummy!! I'm super spoiled.) If you're unsure of how much water to add, try making it with 2 cups and see how it turns out. If it's too thick once it cools, simply add another cup of water and put it back on the heat. It will melt in a matter of minutes at this point because it's already watered down.

3. Stir as you're waiting for the soap to melt in the water
In the past, I've always tossed in the grated soap and walked away. I'd come back every few minutes and very little progress would be made as far as melting is concerned. I'd stir it and walk away again. I'd do this for upwards of an hour and a half! Ain't nobody got time for that!! I tried stirring it today and, what do you know, it went so much faster. A matter of 15-20 minutes or so!

**Remember- 
Bring the water to boil and then turn down the heat so no bubbles are surfacing
 before you put in the soap. The soap will burn to the bottom of the pan if you melt it at 
too hot a temperature. 

4. Wait for the soap to cool completely before putting it into your container
The soap will solidify a lot which leads me to my next tip...

5. Blend it
In a blender. Or if you happen to be one of the lucky ones, use your immersion blender. The blender will break it up so it's no longer solid and make it so nice and creamy and rich. And it will stay that way when you put it in your body wash container.


I hope this helps. Making body wash used to be stressful for me because I never knew how it was going to turn out. But now I know that by using these tricks, the process will be easier, faster and the end result will be so worth it.

Wednesday, April 17, 2013

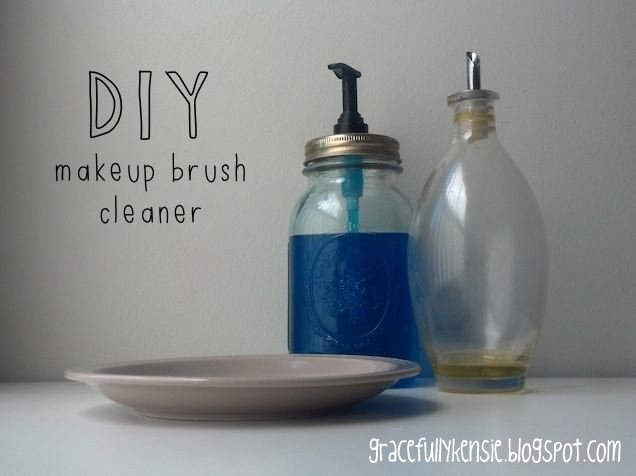
DIY Makeup Brush Cleaner

I've started to notice a trend in my life- the more boys I have and the longer I have them, the girlier I become. I think I'm just trying to balance out all of the insect flashcards and laughter when poop is mentioned. Anyway, with my ever increasing girly-ness comes more makeup. Okay, maybe not more makeup per se, but definitely makeup more often. I've also developed a good little army of makeup brushes that require some thorough cleaning with my increase in makeup application. I've tried a couple different recipes and I really liked this one. Anne-Marie posted this recipe over on The Beauty Book.


Makeup Brush Cleaner:

3 parts antibacterial soap (I just used the Dawn dish soap I had on hand)

1 part olive oil


I used the same technique she described in her post- get the brush wet, get some of the makeup brush cleaner on the brush and stroke back and forth on the palm of your hand. Do the same thing under running water to rinse it. 


Anne-Marie recommends wiping off the handles of your brushes as well. I used one of my new homemade, reusable, knock-off Clorox wipes (tutorial to come soon). You can see all the makeup that was just hanging out on my brush handles. 


I hung the bristles of my brushes over the edge of my desk so the water doesn't sit on the hairs and form mildew or eat away at the adhesive holding it all together. 


I really like this method. With this recipe, I KNOW that my brushes are getting squeaky clean and I'm eliminating any bacteria that might have started to lay down some roots.

What's your makeup brush cleaning method?


Friday, February 22, 2013

Homemade Body Wash & No-Grate Review

***Update: Check out my update on homemade body wash for all the tips and tricks I've developed that make the whole process easier, faster, and so worth the effort for the end result!***

I'm the kind of person that can't justify making a new product to try if I still have some store-bought product left to use. So when I ran out of body wash the other day, it was the perfect time to try homemade body wash from One Good Thing by Jillee. And the best part (or so I thought)- I didn't have to grate the soap! We just happened to have a bar of Dove soap laying around so it was perfect. I was so excited! The stars definitely aligned for me on this project.


No-Grate Homemade Bodywash


1 bar of soap
(I used Dove, but its entirely up to you)

3 cups of water


Jillee's recipe calls for 2 cups of water per bar of soap, but after making my Shmancy Liquid Hand Soap and seeing how much that solidified while cooling, I decided to add another cup to be safe.


I brought the water to a boil on the stove then turned it down to medium. Then, I stuck the whole bar of soap in a microwave-safe bowl and set it for 90 seconds.  Be sure to watch it constantly because it will overflow. I added the soap to the water and waited for it to dissolve completely. Once it was done, I put it in a glass container to cool off, probably for only about an hour or two. After that, I put it in my cleaned out body wash container, stuck it in my shower and waited for the next time I needed a bath.


A few notes on this project- I personally didn't like the no-grate method. I wouldn't call the consistency of the soap "melted," per se.  I'd refer to it more as "foamy," so it didn't just pour out of the bowl into the pot. I had to use 2 spoons and scrape the soap off of each of them.  I had more dirty dishes when I was done and they were completely caked in soap. It also took longer to dissolve in the water than if it had been grated. I, personally, don't think it was worth saving myself from grating the soap. I probably won't do it again.

However, I am very pleased with the body wash itself. I'm glad I added the extra cup of water because the consistency came out like a slightly thicker version of body wash. I need to keep my container upside down so it doesn't stay stuck to the bottom, but that doesn't bother me. I'm a big advocate of the no-suds soap, as I talk about in my Shmancy Liquid Hand Soap post, but when it comes to body wash, I love a nice, luxurious, lather. This definitely delivers and it doesn't require as much product to produce it. It also doesn't leave you with that draggy feeling after rinsing that bar soap sometimes can.  My skin felt very soft, clean, and moisturized.


I'd say this is a great money-saving project with results even better than store-bought body wash. As you can see, it only filled up about half of my bottle, so I'll probably double the batch next time. I hope if you try melting the soap, you have better luck than I did.

***Don't forget to check out my update on homemade body wash so you can see all the little tips and tricks that will make your body wash-making experience so much faster and easier and definitely worth it!***

Friday, February 15, 2013

Shmancy Liquid Handsoap


If you’re like me, you take home every little toiletry item on the bathroom counter when you stay in a hotel.  There really is no need, but you justify it to yourself. “These would be great for when I’m traveling,” or “I’ll put these in my guest bath for others to use,” or even “These are so cute!  I can’t leave them behind.” But inevitably, they sit in your cupboard for months, even years, just waiting to be used. Well, I found a solution for those itty-bitty bars of soap that have been doing just that- liquid hand soap!


We ran out of hand soap at our kitchen sink recently, which proved to be very inconvenient. It’s one of those you-don’t-appreciate-what-you-have-until-it’s-gone kinds of things. You don’t realize how often you wash your hands until there is no soap to do it with. I remembered a post on One Good Thing by Jillee about how she had made her own “resort quality” hand soap using those little space-hogging soaps, so that’s exactly what I did.


Her recipe made about a gallon of hand soap. Since we’re tight on storage space, I decided to ¼ the recipe.  If you want to do the regular batch with no math, you can find her original recipe here.


Shmancy Liquid Hand Soap

2 ounce bar of soap (I had 1.25 oz bars so I just used 1 whole one and 3/5ths of the other)

1 quart of distilled water

1 ½ teaspoons glycerin

Essential Oils (optional)


This bar of soap was obviously obtained with the excuse, "This is so cute!  I can’t leave it behind.”  I mean look at it! You can't blame me, right? Most adorable bar of soap ever. It was hard to make myself cut it up.


Mine was such a small batch and my bars of soap were so little that I just used a knife to shave off pieces rather than grating it or putting it in the food processor. I heated up the water on the stove, added the soap shavings, and waited for it to dissolve. Once it’s completely dissolved, I took it off the heat and added the glycerin. I added a few drops of Lemon essential oil for a little extra boost of fragrance, but that’s entirely optional. I transferred it to another container to cool off.


Jillee recommends waiting 24 hrs for it to thicken up a bit, but I’m impatient, so I checked on it after about 8 hrs.  It was like rubber. It had formed to the shape of the container it was in and there was no breaking it up.  She said it would thicken up, but that’s not what I expected. I tried whisking it, like Jillee recommended, but that wasn’t cutting it, so I dumped it into my blender, added about a ½ cup of water and hit high speed. That definitely did the trick.  I filled up my old soap dispenser and put the rest in a Tupperware until I need it. 

There are definitely some differences between your run of the mill soap and this stuff.  It's a little thinner and it doesn't really get sudsy when you use it, but that doesn't mean your hands aren't getting clean.  Its natural for us to think "If it bubbles up, than its cleaning." I mean, think about it- is there a cleaning product in your life that doesn't? That's what all the cleaning products I grew up using did. It took me a little while to get used to the idea of no suds when I first made my laundry detergent, but after seeing our clothes were just as clean, possibly even staying in good condition for longer, I was converted. Now its never a big deal when I make something that doesn't produce any bubbles.


We’ve been using this soap for a couple days now and I must say that I’m pleased. However, I would be pleased with anything homemade (I made it, I’m automatically proud of it), so I had my husband put it to the test.  He washed his hands with regular soap and then I had him try the homemade solution. Even he could tell his hands felt softer after using the shmancy soap. My hands definitely feel clean and moisturized and the savings are nothing to snub your nose at.  The only expense I had was the glycerin for about $9, which will last me a long time considering I’m using less than 2 tsp. each time.  I’d say this qualifies as a success.